
Resident Evil: Operation Raccoon City System Requirements
2 DVD SETUP - SKIDROW
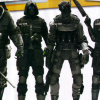
(Developer: Slant Six Games | Publisher: Capcom | Genre: Action Adventure)
Description:
Zombies and Bio-Organic Weapons (B.O.W’s) add to the mix as players not only compete against an opposing squad but also tackle this third unpredictable element, creating a brand new style of gameplay and breaking the conventions of traditional team based shooters.
It is September 1998 and the action centers once more on the ill-fated Raccoon City and the horrific consequences of the deadly T-virus outbreak from the Umbrella facility. With a cover up required, Umbrella orders an elite team into Raccoon City to destroy all evidence of the outbreak and eliminate any survivors. Hearing of this plan, the US Government dispatches its own special forces to uncover any evidence that exposes the cause of the viral infection and Umbrella’s actions. Players take on the role of an Umbrella Security Services soldier (U.S.S.), competing alone or in four player co-op in a battle against all the competing forces at play in Raccoon City.
Features:
• Witness your favorite original Resident Evil enemies, iconic landmarks (such as the Raccoon City Police Department) and fan favorite characters (including Leon S. Kennedy, who as a rookie police officer in Raccoon City is on your hit list to eliminate) in a whole new way.
• Players will experience a retelling of classic moments from past titles Resident Evil 2 and Resident Evil 3 and watch the events unfolding from the menacing perspective of the Umbrella Security Service, giving fans the chance to rewrite the history of the Raccoon City outbreak.
• Delivers a number of competitive online multiplayer modes. Each one of these will provide a unique gaming experience thanks to the three way combat between the Umbrella Security Service, US Special Ops and threat of zombies and B.O.W’s that could only exist in the deadly and twisted Resident Evil Universe.
Minimum system requirements:
Processor: Intel(R) Core(TM)2 Duo 2.4 Ghz or better, AMD Athlon(TM) X2 2.8 Ghz or better
Memory: 2 GB RAM
Graphics: NVIDIA(R) GeForce(R) 8800GTS or better, ATI Radeon(TM) HD 3850 or better
Recommended system requirements:
Processor: Intel(R) Core(TM)2 Quad 2.7 Ghz or better, AMD Phenom(TM)II X4 3 Ghz or better
Memory: 4 GB RAM
Graphics: NVIDIA(R) GeForce(R) GTX 560 or better (Under NVIDIA program, not recommending ATI, but the equivalent card would be Radeon HD 6950)


WALKTROUGH
Mission 1: Containment
After the introductory cutscene has played, exit the elevator and enter the small security room. Pick up the first aid spray from the shopping cart in front of the receptioin desk. Check the safe behind the desk for some intel and ammo by the chair. Grab the stun grenade nestled between some computer terminals and file cabinet just to the right of the desk. Go past the doorway to the far corner of the room and grab the intel hiding on the other side of a server closet. Proceed through the doorway and down the stairs. After a bit of dialog between the squad, soldiers will attack from the floors below and the catwalks.
Once they are dead the barricade to the next floor down will retract. Just to the left of the stairs in front of a cluster of 4 large black containment cells is a computer with another intel pickup on it. Continue down and more soldiers will appear; once they are dead move on down to the bottom floor and one last group of soldiers will appear. On the wall to the right of the stairs are two large white machines with disembodied creature hands inside them and on the machine between them sits another intel item. Follow the wall down, go around the stairs and you will find the next intel piece on a computer desk just on the otherside of those stairs. If you head up the stairs, cross the balcony to the next flight of stairs and follow that balcony to the front corner of the room you will find a weapons chest with a flamethrower in it. Shoot the locks off the chest to obtain the weapon. With the room clear, proceed through the large doors at the back to the next area.
After the cutscene ends, follow the hallway on the left-hand side and kill the two soldiers on guard. On the right side is a computer terminal with an intel pickup on it. Check the connecting passages for any items , then continue on to the nav-marker and down the stairs into a small lobby/waiting room. Grab the intel off of one of the tables and check the back of the room opposite the stairs for a collectable raccoon worth 350 XP. Exit through the marked door and follow the hallway to another laboratory.
In the labs there are a few items scattered around including intel sitting on a computer desk. If stand in front of the steel door the desk is directly behind you. Pass through the labs and exit through a door in the back; this will trigger a cutscene that should be familar to fans of Resident Evil 2. Take cover behind the steel crates as soldiers will quickly breach through one of the doors. Kill the soldiers and push through into the next room. On some crates immediately to the right is the next intel pickup. Once all the soldiers are dead, check the room for any items or ammo then proceed to the large cargo elevator at the back of the room.
After the elevator stop head right to the far wall and to the left of the umbrella door is some metal crates with another intel pickup on them. Then head back past the elevator and down the hallway to the left until a cutscene triggers. Once it ends, head right opposite the way the infected Birkin is heading and on some boxes is an intel pickup then continue to the back of the hall and on the right on a metal crate is another intel pickup. Now, go back through the marked doorway and when the entire team has entered the room the next door will open.
Follow the hallway, taking care to avoid the venting steam and flames. Keep moving forward until another cutscene triggers. In order to slow down Birkin, shoot the large eye on his shoulder. Keep running down the hallway to the door at the far end, shooting Birkin periodically to slow him down. Once at the door, press the Action Button to activate it; the door will take a moment to open so hold Birkin off until then. Once its open, rush through to the other side.
Search the room for items, then follow the nav-marker down the left-side hallway to another room where you are attacked by more soldiers. Kill them, and continue on through another hallway in the back left of the room. A dog will attack you; once its dead continue onward and through the doors into another room where yet another dog will attack. Once its dead, go down the right-side hallway and into a small room with a few items. Go through the next set of doors and take cover as another group of soldiers await you.
After they are dead keep going and eventually you will trigger a QTE event; simply press the Directional Stick in the prompted direction. After three prompts, quickly turn around and run to the end of the hallway. As before, shooting Birkin's shoulder eye to slow him down if need be. Go through the door at the end of the hall and keep running, taking care to avoid the venting steam and flame. At the end of the hallway a cutscene will trigger that ends the mission.
Mission 2: Corruption
At the start of the mission immediately turn around an collection the intel off of the crates behind you. Follow the stairs down and enter the caged supply room on the right for another intel pickup. Proceed through the way doorway; in the next room there is an antivirus spray to the left on a shelf of supplies. Continue on through the boiler room to the next doorway. Head to the right in the next room past the over turned couch and you will find the third intel pickup on the matress. Move the up the stairs and into the next room.
When you open the door a zombie will grab you and pull you into the maintenance room. Dispatch the zombies in the room and grab the fourth intel piece sitting on the shelf of bankers boxes next to the workbenches. Head into the office through the next door and clear the zombies. There is a room to the left up the short flight of stairs with some weapons and ammo in it. Just past that room and around the corner is the fifth intel pick up on a short table of bankers boxes. Head back to the door with the way point and grab the seventh intel item off of the lower shelf off of the table to the right of the door.
A short cutscene will play when you open door. Run past the stairs and grab the eighth and ninth intel pickups sitting on the ground. Head up stairs and into the foyer filled with zombies. Cut through the zombies and around to the next way point. Grab the tenth intel just to the left of the door. Head down the hallway to the right of the door for the eleventh intel pickup by the pile of burning furniture. Head back to the waypoint and through the double doors.
A spec ops ambush will start as soon as you enter the room. There is a total of three waves and they are of equal intensity. Once the soldiers have been delt with head back to the doors you enter through and look at the pile of furniture to the left to find the twelfth intel item. Turn around to face the way point and head up the stairs to the left. On the right, just past the spotlight, is the thirteenth intel pickup on a banker's box. Head back downstairs to the way point.
In the next area, a group of spec ops show up directly ahead by the statues. Eliminate them quickly and head right down the hallway. Go in the middle door and nab the fourteenth intel item off of the desk. Head right out of the office and follow the hallway around towards the way point. Right before the last corner is a pillar with the fifteenth intel pickup.
Head into the next room and dispatch the two spec ops. There is a laptop on the table to the right of door you came in on in which you can turn in your intel pickups for 50 XP each and unlocks concept art. Before doing so, scoure the room for the four intel pickups (16-19) there.
Mission 3: Lights Out
The mission begins in the main lobby of the Raccoon City Hospital. Go behind the reception booth and open the door to head inside it; check on the counter for intel as well as the shelves near the back. Head back out into the hallway and check the doors opposite of the door leading into the reception booth; one set will be unlocked, so head inside and grab the intel off of one of the counters. Continue on down the hallway until you come to a door marked with a nav-marker; go through the door to the left of it and grab the Key Card inside. Head back down the hall to the very first door and use the Key Card on it to enter another examination room. Go inside the room to find a Stun and Frag Grenade as well as a weapons crate that will contain a grenade launcher. Head back out into the hallway and head back to the nav marked door and go through, this will trigger a cutscene.
The team will enter what appears to be the hospital's cafeteria that was host to a retirement party when the outbreak hit. After being taunted by Nicholai, zombies will swarm you. After disposing of most of the zombies, more will enter the room through a double wooden door at the back of the room; take care as some of these zombies will have bombs planted on their heads. Once the zombies are dead, check the room for any items you need and be sure to search the tables for intel. Go through the marked doors at the back of the room; to the left of the doorway is a nurses station. Check the countertops there for intel as well as a Green Herb. Go left down the hallway; zombies will break through a door near a gurney with a body on it. Kill the zombies and proceed through the doorway. This will lead into a doctor's office; use the terminal inside to turn in any intel collected and check behind the doctor's desk for a can of First Aid Spray. To the right of the doorway is a stairwell leading down; go down the stairs and zombies will break through the door at the end of the hall. Kill them and press on into the next room. Eliminate the remaining zombies, then check behind the nurses station to find a vial of T-Virus antidote. Check the bathroom's opposite the nurses station; one of the contains intel which can be found near some bathroom stalls.
Head back to the nurses station and pass through the doorways on either side, making your way into the small room behind the nurses station to grab a Key Card. After picking up the Key Card, head through the back of the room past all the gurneys with corpses on them and use the Key Card to unlock the nav marked door. After entering the room Lickers will attack as well as zombies; be sure to shoot the Lickers in the brain as its their weak point. After the monsters are dead head right through the room to the door on the far side; shoot out the trip mines blocking the door. Two bomb-rigged zombies will attack you, so be ready. Once you are through the door a lone licker will drop down and attack; kill it. To the right is a blocked-off hallway guarded by a lone trip mine; set it off to gain access to a First Aid Spray canister. Go through the marked doorway and up the stairs, shooting out the two laser trip mines. Enter the room at the top of the stairs and another group of zombies will attack you. After the zombies are dead, check the trolley near the door previously used to enter the room for some intel. On the left side of the room is another nurse station with intel, as well as a terminal to turn them in at. Go through the marked door near the nurses station and proceed on through to the next marked door. Take the stairs up and head right; the door at the end of this short hall is blocked by three laser trip wires. Shoot them out and go through the door which leads to the rooftop of the hospital.
After a short cutscene Crimson Heads attack; kill them quickly and a second, smaller group will attack. Once they are dead, grab the Green Herbs near the rooftop doorway if needed. Otherwise head to the helipad and trigger another cutscene. After the cutscene, the hospital is now ablaze and Wolfpack needs to exit ASAP. A zombie will break through the door to the room you are in; kill it and move forward through the door into the next room and through the sole door ahead of you. Turn right and go through the double doors and into another flame-bathed room. Check near the gurnies for an ammo box and an Incendiary Grenade. To the right of the gurnies it is apparent that the floor has partially collapsed, giving access to the first floor. Kill the zombies and Crimson Heads before heading down to the lower floor and through the double doors marked with a nav marker. Head through and move down the hallway towards the door on the far left side; two Hunters will break through the doorway. Hunters are tough and will go after whomever is dealing them the most damage; use grenades and shoot at their stomach to drop them as quickly as possible. Once the Hunters are dead, use the Ammo Box near the door they broke through to restock on ammo, then proceed through the door they burst through. There is a Green Herb on the far left side of the room if needed, as well as a vial of T-Virus antidote. Turn right and head through the room towards the nav marker; as you approach it look up and see that the ceiling has laser mines attached to it. Another Hunter will attack; leave the mines alone and, with a little luck, it will set a few of them off before reaching you. Kill the Hunter, and shoot out the remaining mines before crossing the room and making your way to the exit. The exit is mined with two laser trip mines; shoot them out then head through the doorway to finally escape the hospital.
Once outside the hospital, take the short stairs down and follow the nav marker to the buildings across the street. Head through the building and once on the other side you will find a squad of Spec Ops soldiers battling zombies. Eliminate the soldiers and wipe up the remaining zombies before proceeding down the street; as you are heading down the street check the blocked-off road to the left for a few Frag Grenades sitting on a Fire Engine. Head down the street to the nav marker and grab the Green Herb near the metal shutter if needed; once there turn right and head down the road to the fenced-off area and to the nav-marker in the right hand corner. After the short cutscene, check the case near the corpse directly in front of you for some intel and a Pump-Action Shotgun. Turn right and head down the path alongside the building; you will come to a broken brick wall; check the area opposite it for ammunition before proceeding through the broken wall. Once on the other side you will see the downed helicopter; the first EMP device is located right next to the helicopter and is easily visable due to its bright orange/yellow light. Once you grab the EMP device zombies and Crimson Heads will enter the area. The second EMP device is on the right side of the map, down in a slighly sunken area opposite a bricked path with garbage cans on it. After grabbing the second device, head north to the large wrought-iron gates and head through them and into the front courtyard of the Saint Michael Clock Tower.
After a short cutscene, Wolfpack will engage in a semi-bossfight against Nicholai. He will snipe at you from the second floor of the clock tower and throw grenades at you. Simply shoot him when he is exposed; there is a weapon crate in this area containing a Sniper Rifle if needed. After doing enough damage to him, the clock tower's bell will ring and zombies will attack. Kill them and re-engage Nicholai when he appears. He will do this two to three times; after the final time he will flee and the U.S.S. Commander will radio the team and tell them that Nicholai is no longer a priority target. Enter the clock tower building via the door to the left of the main doors and into a room that should be familar to fans of Resident Evil 3: Nemesis. Check the bench in front of the piano for some intel, taking care because some of the bodies in the room aren't dead. To the right of the entrance to the room is yet another room RE3 fans should recognize; kill the zombies in the room and grab the third and final EMP device off the altar. To the left of the altar is some intel; shoot out the laser trip wires to get at it. After grabbing the EMP device, zombies will break into the room though a side door; kill them and head through the door. Head outside and up the stairs to the next nav-point; go down the stairs and move forward. Once you are near the burning and crashed cars Spec Ops soldiers will attack. Take them out and continue down the street; take care because there may be one or two more taking cover behind a taxi around the corner. Once the soldiers are dead, continue on down the road and up the stairs into the Raccoon City Water Works building.
Once inside, head straight and take a left through the nav-marked doorway. Turn left and head down the stairs, then turn right and head down a small set of stairs and take another right and go down the hallway. In the room adjacent to the nav-marked door is an ammo box as well a Heavy Machine Gun and a Precision Rifle. Head through the marked door and into the Water Works' generator room. Go to the marked console to raise the first generator; after doing this Spec Ops soldiers will enter the room and defend the generator. Shortly after this, zombies will also enter the room. Kill the Spec Ops soldiers and head to the generator and place the EMP device on it. Now run to the nearby marked console to raise the second generator; watch out because a second wave of Spec Ops soldiers will enter the room through a nearby door. Kill them and move down to the second generator and place the second EMP device. Another nearby console will raise the third and final generator; run to the generator and place the final EMP device on it to trigger a cutscene and end the mission.
Mission 4: Gone Rogue
Before exiting the small room the mission begins in, turn around and check the room behind you; on the two computer desks is some intel. After exiting the room you will emerge back onto the city streets; kill the zombies outside and proceed to the left down the street towards a crashed bus. More zombies and a few Crimson Heads will attack; gun them down and proceed around to the other side of the crashed bus. The weapon crate nearby contains a Bolt Action Rifle; continue on down the street to encounter a group of Spec Ops soldiers sniping at zombies from buildings across the street. Kill them (use the Sniper Rifle if the soldiers prove difficult to hit) and continue down the street toward the nav marker. Upon reaching the nav marker a Spec Ops team will ambush you; take them out (shooting the explosive barrels is particularly effective). Head on down through the crashed cars, but be wary near the crashed cop car as the path is mined with laser trip wires. Shoot them out and continue on to the marked gates to enter the Raccoon City Cemetary.
Immediately after entering the cemetary 4 zombies will shamble up the path to attack; kill them and move on down the path. Head down the stairs to the lower part of the cemetary; a group of Spec Ops is engaged with a group of zombies. Kill the soldiers and wipe up the remaining zombies. Once they are dead take the path down on the right-side of the map to encounter another Spec Ops group. Continue past the soldiers and the team will emerge into another section of the city; head to the nav marker and go through the door to enter one of Umbrella's warehouses. Once inside the warehouse, run to the marked panel and activate it; the metal shutter doors open partially allowing zombies to enter the room. To open them fully, turn around and flip the three marked breaker panels in the room; once the doors are open run to them and enter the next part of the facility. Head left and you will run into a group of Spec Ops soldiers. Kill them and take the stairs up to the second floor and through the door they were guarding. Continue down the hallway to a small security room at the end and activate the console inside. Enter the elevator directly across from the security room.
Once the elevator stops, the team will emerge into one of Umbrella's many labs. Head left through the marked doorway and once in the next room, stick to the right-hand side and go through the marked door and into a smaller lab. This will trigger a cutscene introducing you to a new enemy, the Parasite. These monsters can latch onto zombies and control them; the easiest way to kill them is to shoot them off of the backs of zombies which will kill the zombies as well. After the cutscene, turn right and head down the stairs to the lowest part of the lab; your objective is the Tyrant laying on the operating table behind a laser fence. Turn to the right and head to the opposite end of the room, taking care to kill the zombified soldiers caged behind similar laser fencing. Shut down the laser fences by flipping the marked breakers and check the area where the zombie soldiers were for a large Syringe. Run back to the Tyrant and use the Syringe on it to remove its NE-a Parasite. Head back upstairs and to the nav-marked door; this will trigger a cutscene in which the Tyrant wakes up and begins attacking everything in sight. To get through the door you need to locate three Key Cards, so run to the nav-marked spot on your map to grab the first key. The Tyrant cannot be killed, so avoid wasting ammo on it. Once you grab the second and third keys run back to the door; now the security systems must be shut down in order to exit the room. Head to the spots marked with a nav marker and use the consoles to shut down the labs security systems. Once the two consoles are shut down, run to the nav-marked door and wait for it to open; once its open head through and it will seal you off from the zombies and parasite zombies.
Head up the stairs past the two nav markers; a group of parasite zombies will attack. Kill them and the Tyrant makes a second apperance. Avoid it and follow the nav markers to a small security room and an elevator you can use to escape the labs. After exiting from the elevator, turn left and head down the hall and through the open double doors. This will trigger a cutscene.
Your objective now is to do enough damage to Nemesis to momentarily incapacitate him so the functioning NE-a Parasite can be injected. To the immediate left is an ammo crate that can be used endlessly to restore your ammunition. When shooting at Nemesis, aim for his head as this will deal more damage. Take care to avoid taking too many shots from his Gatling Gun, as it deals quite a bit of damage. Also avoid standing near the explosive barrels littered throughout the room; standing near them when they explode will instantly kill you. After inflicting enough damage on Nemesis, a group of Spec Ops soldiers will enter the room. Use this momentary diversion to revive any teammates and to replenish your ammo; when ready take out the Spec Ops team and once they are dead refocus on Nemesis. Once Nemesis collapses run to it and use the Action Button to inject it with the parasite; taking too long to get to Nemesis and it will get back up and force you to take him down again. Sucessfully injecting Nemesis will trigger a cutscene that ends the mission.
Mission 5: Expendable
This mission begins with Wolfpack on a rooftop overlooking a small group of zombies below. Move forward across the wooden planks bridging this rooftop to the next, and take out as many zombies from up here as possible. Move on and take the wooden ramps down to street level and pick off any straggling zombies.Head north towards the nav marker; on route to the nav marker a door on the left side will blow outward and more zombies will attack. Kill them and continue on to the nav marker; once reached turn left and head down the street. Kill the zombie dog that attacks, and head up the stairs on the right side of the street. Grab the Green Herb if needed and head through the marked door to enter the Raccoon Police Department. Go down the hallway; when the hallway branches off right, head right. Grab the intel off of the stuffed tiger display and enter the doors behind you to get into Chief Irons' office. On the left side of the room is another collectable raccoon; your objective is on Irons's desk. Once the objective has been destroyed, head back out into the halls and the team will be attacked by a pack of Lickers. Once the threat has been dealt with continue on to the next nav marker; upon approaching the door they will burst open and zombies will attack. Kill them and press on through the doorway.
The team will emerge on the second floor balcony of the RPD building's main lobby. Zombies and Lickers will attack; once they are all dead head to the nav marker and use the ladder to descend to the first floor. Kill the zombies infesting the area and head to the RPD's main doors; zombies will burst through. Kill the zombies and push into the RPD's front courtyard, killing the rest of the zombies. Hit the nav marker to trigger a cutscene that should be very familiar to fans of Resident Evil 2. After the cutscene, go through the RPD's main gate and onto the streets, killing any zombies while heading north towards the crash site. A weapons crate near a parked SWAT truck contains a grenade launcher. Approaching the nav marker will trigger a cutscene in which Leon runs off. Head towards the shutter door he escaped through and zombies will swarm you after triggering the door; kill them all and head inside. Another short cutscene with Leon plays and he runs off again; the team is then attacked by a horde of Lickers. Use the ammo boxes to replenish your ammo supply and kill each and every one of the Lickers. Once the last one has fallen, you will recieve a message from U.S.S. Command. Activate the nav-marked door; kill the zombies waiting on the other side and proceed onward. There are Spec Ops soldiers in the area; head left down the street (one or two soldiers might be waiting in ambush) and use the fire escape to get onto the rooftop of a nearby building to give yourself a better vantage point. This same rooftop has a weapons crate with a Sniper Rifle inside it; make sure to use it to snipe at the Spec Ops snipers across way from you under a large "MOTEL" sign.
Once the soldiers are dead, head back down to street level and proceed north towards the nav marker. At some point another group of Spec Ops will attack; take cover and wipe them out. Once the soldiers are dead, continue on and hit the nav point to trigger another cutscene. After the cutscene, the pods the helicoper dropped will open up, releasing Hunters. Use grenades and everything at your disposal to kill these monsters and aim for their stomach. Once the hunters are dead, follow the nav marker down an alley on the right hand side; a zombie will attack and another Hunter will leap over the wall at the end of the alley to attack. Retreat while firing at the Hunter's exposed underside to kill it. Once its dead continue back down the alley and take a left and continue on until you hit a pile of debris. Press the Action Button to pass through and onto the next area. The team will emerge near a large gas station, and will be attacked by Spec Ops. After dealing with the soldiers, more Hunter pods will be dropped. Use the same tactics as before to deal with them; a nearby weapons crate contains a grenade launcher which can prove very handy. Once the Hunters are dead continue on right past the gas station to the nav marked door; upon nearing it Spec Ops soldiers will come out and attack. Kill them and push on through the doorway; to the right is a door that when approached will break open and zombies will attack. Push through the zombies and continue on down the hall until another door breaks. This time Crimson Heads rush through the door; destroy them. Once out of the hallway, go right follow the path to the next nav marker. Progressing through the alley will trigger another attack by Spec Ops; kill them and press onward. Once back on the city streets, take care as the Spec Ops are occupying the courtyard of the large municipal building and one of them is on an elevated platform with a Sniper Rifle. Kill this one first, then press on from cover to cover taking out soldiers.
Once in the courtyard area, take cover and eliminate any soldiers; once they are dead continue on and follow the path back down onto the city streets. Another group of Spec Ops will attack; use the various cars as cover and take them out. Continue on until more Hunter pods are dropped; kill the Hunters and if need be, use the nearby Flamethrower from the weapons crate to even the odds. Once the Hunters are dead press on and another group of Spec Ops will attack; kill them and press onwards. The soldiers here are well entrenched and should be picked off one by one if at all possible. One their ranks have been thinned, continue on into the courtyard and kill any remaining soldiers before hitting the nav marker and heading down into a grassy area. Zombies and Crimson Heads will attack; once they are dead head north toward the broken part of a barricade and go over it and head toward the nav marker at the Barber Shop's door. This will trigger a cutscene, and a boss fight.
The Tyrant will attack you various punches or kicks, by leaping at you and performing a ground pound or by charging you. Due to his size his attacks are not hard to avoid; if ammo becomes scarce one of the buses has an ammo crate behind it. Shoot the Tyrant in the head to damage it; after dealing enough damage a second Tyrant enters the fray. Focus on one Tyrant and continue shooting it and avoiding its attacks until it drops. Repeat the same tactic on the second Tyrant until it too falls; these monsters take quite a bit of punishment before dying so this fight may take awhile. Once both Tyrants are dead head to the nav marked door to trigger a cutscene and end the mission.
Mission 6: Redemption
The mission begins on a cargo train platform; head right and go through the train cars and take the stairs up to a walkway overlooking the platform. From this vantage point, eliminate as many zombies below as possible before proceeding to the stairs on the opposite end of the walkway. At the bottom of the stairs, go left and around the large cargo container and kill any zombies and Crimson Heads in the way. Work your way to the large cargo elevator and activate the marked control box to raise the lift; this will cause zombies and Crimson Heads to attack. Defend the platform until it arrives; when it does kill the zombies on the cargo lift and get on board, using the marked control box to send the lift down to the labs. The lift will stop twice on the way down; simply kill the zombies that attack you and activate the marked control boxes to reactivate the lift and continue down. Once the cargo elevator stops for the third time, exit the lift to trigger a cutscene.
Getting at Ada is extremely hazardous as the hallway before her is mined with laser trip mines in addition to her throwing incendiary grenades and firing down the hallway, which causes significant damage. The best way to handle this is to stay out of her sight as long as possible while shooting out as many of the mines as possible; unfortunately at least two of them are hidden behind crates and cannot be shot at from a distance. Use carefully placed grenades to set these last two mines off. Once the mines are neutralized, take cover and shoot Ada until she staggers, then run down the hallway and take cover behind one of the crates. Repeat this and keep jumping from cover to cover and get as close to her as possible; once in the same room as her a cutscene will trigger and Ada will retreat. Shoot out the two mines blocking your progress and follow her out of the room into a large open chamber; Spec Ops will attack. Once the soldiers are dead, head to the nav marker and soon enter a room filled with cargo containers and zombies; kill the zombies and search the containers for items then proceed to the nav marker and activate the cargo elevator.
Shortly after the elevator begins to descend a pack of Lickers attack; kill them and continue riding the elevator to the bottom where a group of zombies and parasite zombies await. Once the zombies have been dealt with, head right towards the nav marker.The team will enter a large furnace area; head right and then take the left ramp up to the second floor. Kill the Hunters you encounter, then head to the nav marked door on the left side down one of the ramps. Go through the door and into a small waiting room/lobby; take the stairs up and go down the left-side hallway and follow the nav marker to enter the lab's security room. Activate the security console to trigger a cutscene then head right and go through the door at the end of the room. Keep going and eventually you will emerge into another hallway and a group of zombies will attack. Once they are dead, go through the large marked doors to enter a huge lab room crawling with zombies. Occasionally Hunters will break out of the stasis cylinders found throughout the room; kill them and press on towards the marked door on the third floor to enter the small security room where the game began. Enter the marked elevator shaft and use the ladder to climb the shaft.
You will emerge in another furnace room and quickly be attacked by a group of Hunters; quickly run up the ramp to the marked ladder and use it to climb to the next level. Instead of hunters, now Crimson Heads attack. Wipe them out and head to the marked door on the left side of the map. Approaching the door will trigger a cutscene. After the cutscene, check the nearby Weapon Crate for a Hammer assault rifle, then get on the cargo elevator and activate the console. After activating the lift, a cutscene will trigger and a familiar foe will engage Wolfpack. To get rid of Mr. X, shoot the glowing spot on its chest until it falls off of the lift; run around the lift avoiding its melee attacks and use the Ammo Crate to replenish ammunition. Once Mr. X is knocked off, the lift resumes for a short while until a group of Lickers attacks. Kill them to cause the lift to move; look up and move towards the opposite ends of the lift to avoid the gouts of fire from the sides of the elevator shaft. After passing the third flame jet, Mr X returns. Use the same tactics as before to knock it off the elevator again; once its gone the elevator will continue up. Once the elevator has reached ground level, exit the elevator to trigger a cutscene and end the mission.
Mission 7: End of the Line
As soon as the mission starts turn around and pick up a frag grenade behind the white van then climb down the ladder and pick up a First-Aid Spray near the dumpster. Move forward, you'll encounter a fat zombie that comes back to live when you approach him, shoot him and collect the intel standing by his side. There is also a weapon box containing a Precision Rifle in this location.
Keep moving forward and you'll witness a short cutscene, shoot the approaching Crimson Heads, there are 3 in total, as fast as you can and keep moving forward, you'll encounter 3 more zombies.You can find more intel in the back of the white van. You'll find a frag grenade in the back of a truck next to the ladders that you must climb.
Climb the ladder you are now in the middle of a bunch of containers. As soon as you climb throw a grenade down into the group of zombies standing below. Then immediately take cover behind the containers since there are Spec Ops snipers in this location. If you run out of ammo before you climb up on top of the cargo containers, head back to the beginning for the Precision Rifle, that way you can shoot down the snipers easily, just keep in mind that if you are going for the S+ ranking you only have 30 minutes to complete the mission so don't waste a lot of time. Alternatively you can use Vector's camouflage to get past this area without being caught by enemy fire.
Follow the containers and climb down the ladder killing the zombies that approach you, you can find more intel inside a container near the stairs. You can also pick up a grenade launcher in this area, use it to kill the remaining zombies and then go to the right of the box containing the grenade launcher, there's an antiviral spray in this area. Climb up the stairs and take cover behind the containers, there are two snipers in the crates directly in front of you, use the grenade launcher to destroy the zombies below and keep on moving, you will now be between two crates, there's a pack of zombies between the crates so use the grenade launcher to take out the zombie crowd. You might want to go back and regain your main weapon if the grenade launcher is out of ammo.
After you climb back down the ladder, go to the left to find some more intel inside a container, then go to the right, there are two Spec Ops here, take them down, it might also be a good idea to make them bleed forcing a bunch of zombies to appear and attack them, that way you can throw a grenade to the middle of the crowd and destroy them all to farm the 150 kills. You can find intel in the back of the truck with the sirens on right near the train, there is also a computer, ammo and a green herb in the top right corner of this area. You can also find a frag grenade behind the fire on the side of the container. Then, enter the marked train car, pick up the First-Aid spray if you need it and drop down the other side to continue.
As soon as you drop down Claire will use grenade launcher to attack you and make you bleed which will make a lot of zombies come after you, throw one or two grenades at the approaching zombie crowd to prevent them from getting close. Four Spec Ops will appear and attack you and to make matters worse this area is full of mines. Destroy the mines and climb up the stairs to reach an elevated position, take out the two spec ops, there's a computer here. You can then either shoot the two remaining Spec Ops from the elevated position you are in or go back down and kill them, keep in mind more zombies will appear so make sure you don't get shot and start bleeding or they will all come after you. Go forward, enter the marked train and jump back down, right in front of you there will be a truck on the floor by the truck there is some more intel that you can collect.
You are now standing between two trains filled with mines, destroy the mines and kill the zombies that crawl out from the trains, keep going forward but be careful since a Spec Op soldier will appear as you reach the end of the path. There's a First-Aid Spray here along with an Antiviral spray and ammo. As soon as you reach the end of the path you'll be interrupted by a cutscene with Leon.
This area is pretty chaotic, you have to deal with Spec Ops, Crimson Heads and last but not least Leon, who will try to shoot you down with a sniper rifle. There's a crate right in front of you that you can use to take shelter you can also find two frag grenades here. Run to the barricade and take cover behind the wall, shoot a few Spec Ops and make them bleed, this way the Crimson Heads will attack the Spec Ops and destroy the barricade. Throw grenades at the crowd to destroy them. You might want to farm some kills here, just be careful since Leon will try to shoot you down. As soon as you killed everyone go pass the barricade and keep going forward, don't climb the marked ladder yet. Instead keep going forward past the big train and then go right, you'll find the Raccoon City Mascot in the corner. Afterwards climb up the marked ladder, it's time for the final showdown...
After the cutscene you'll need to make one of two choices, kill or defend Leon S.Kennedy.
If you choose to kill Leon then you will have to fight him and two of your teammates, there are multiple weapon boxes containing: a grenade launcher, a heavy machine gun and a mob gun which you should use to take down your enemies fast. You can also climb up the set of stairs to reach a small office containing some more intel, green herbs and a weapon box containing a precision rifle. Take down your two former teammates and go after Leon, he will spam you will multiple frag grenades that can cause a lot of damage. Just keep shooting him from a distance and you will eventually take him down. I recommend that you use the grenade launcher since it will make him fall the ground giving you some more time to get closer and shoot him. Don't engage in a direct gun fight with him since you'll most likely loose, even with lower difficulty, unless you use Lupo's Super Soldier skill.
If you choose to save Leon, like the video above shows, then things will be easier since you'll only have to kill your two teammates.
You need to choose both options to get the two different trophies and you also need to die once after choosing the option to save Leon to get the "Died Trying" trophy.
Afterwards just sit-back and enjoy the very short ending...Congratulations you finished the campaign mode=)


0 comments:
Post a Comment